
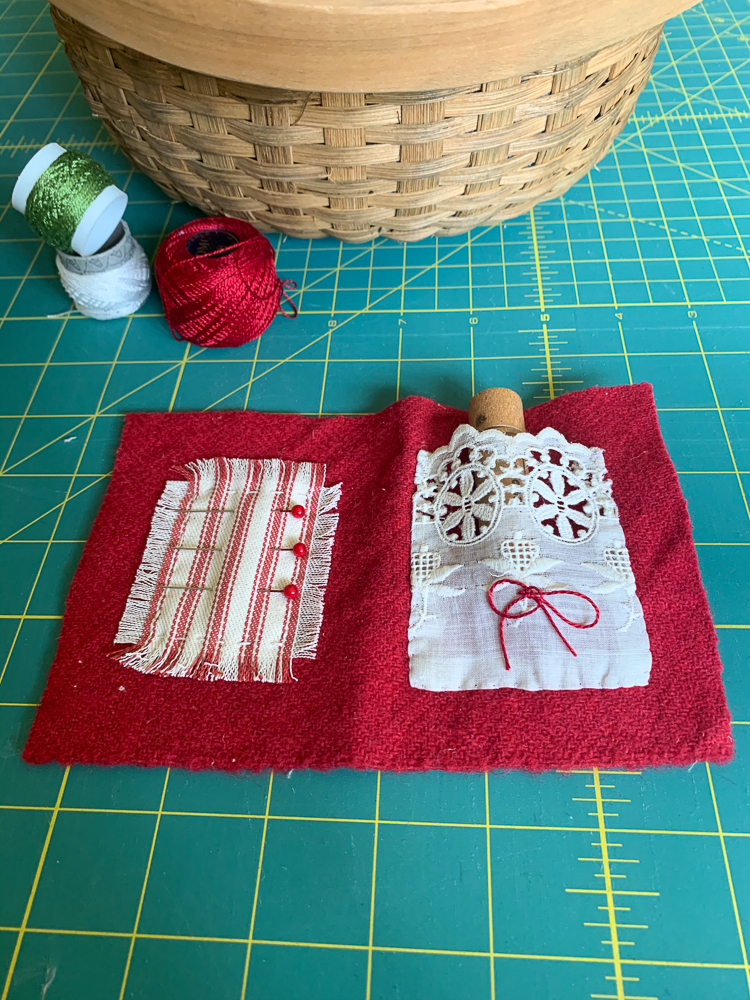
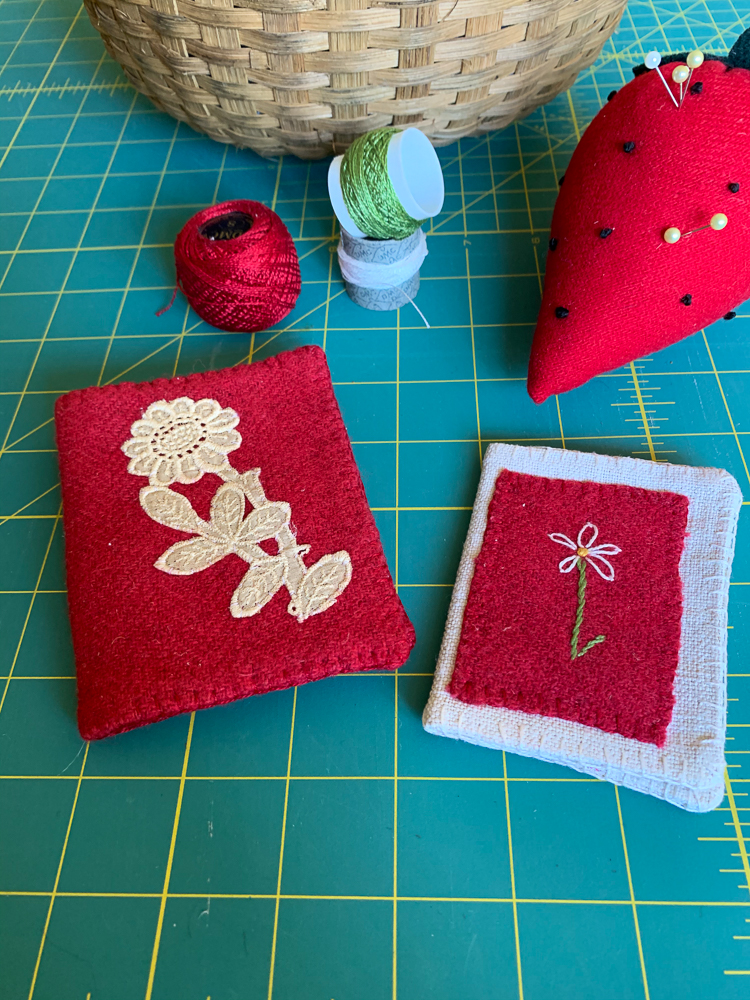
Many years of sewing and designing creative fiber arts projects has taught me that if you plan ahead it makes for less ripping out of misplaced stitches or rethinking the design. I learned that lesson at a young age because my Grandmother made tailored coats and jackets. That type of sewing requires precision, so as I worked on sewing projects with her she instilled that desire for perfection in me. In writing the instructions for the tutorial on the needle keeper, I realized that I still use many of the techniques she shared with me many years ago. If you are visiting my blog for the first time today you can find the supply list, pattern and cutting and design instructions here for the needle keeper featured on the Miss Mustard Seed blog. The history of this design and description of the page elements can be found here.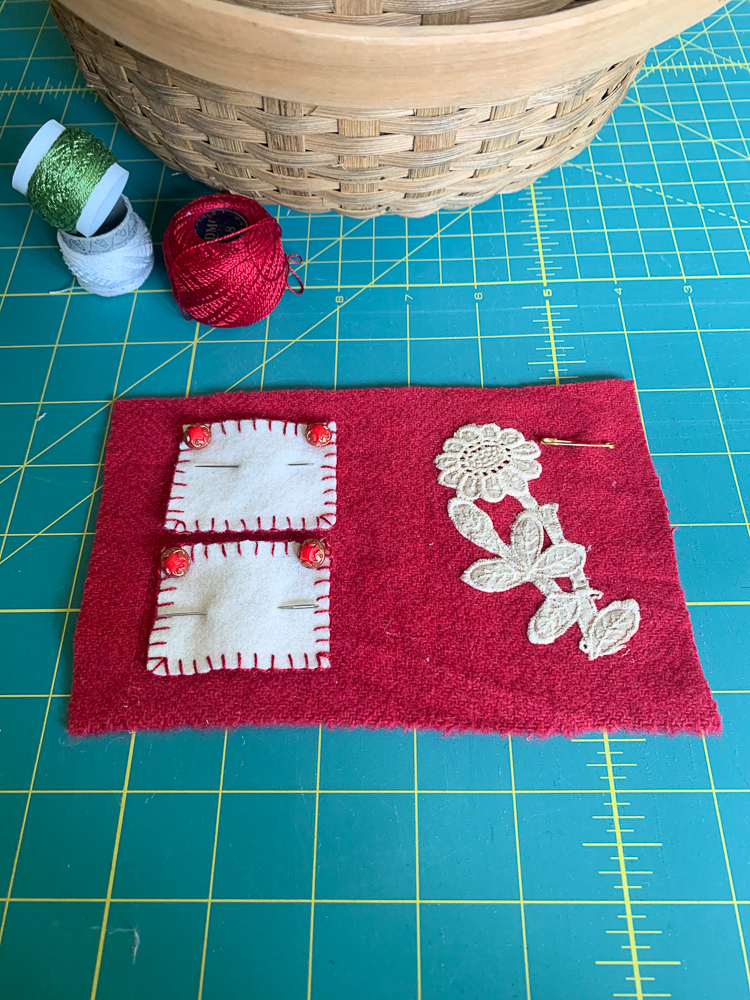
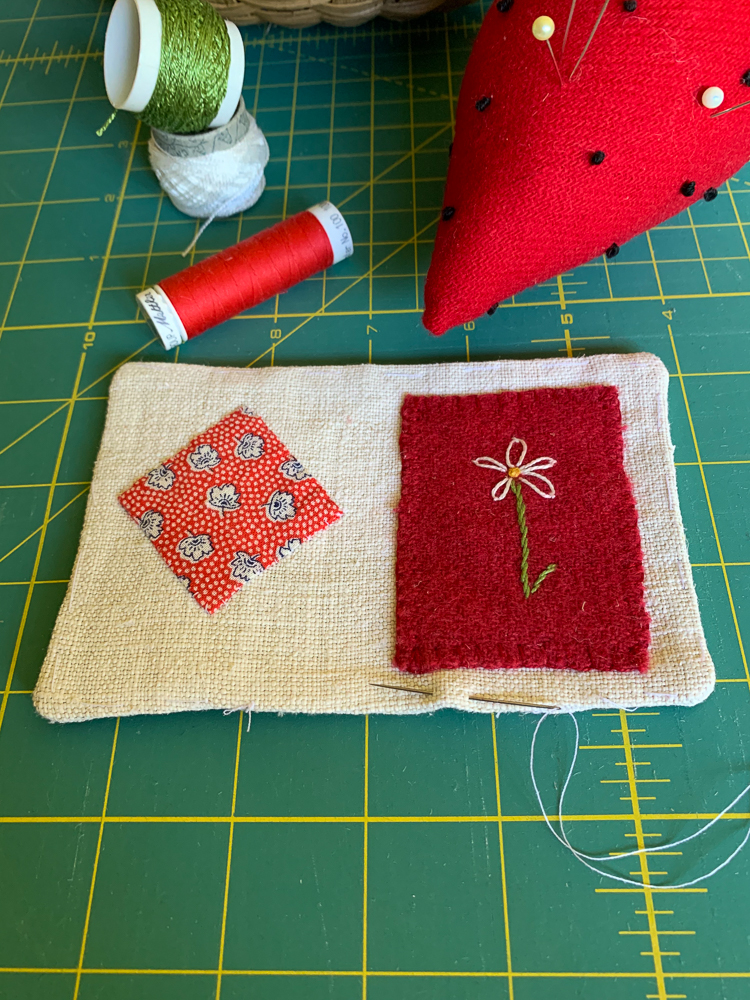
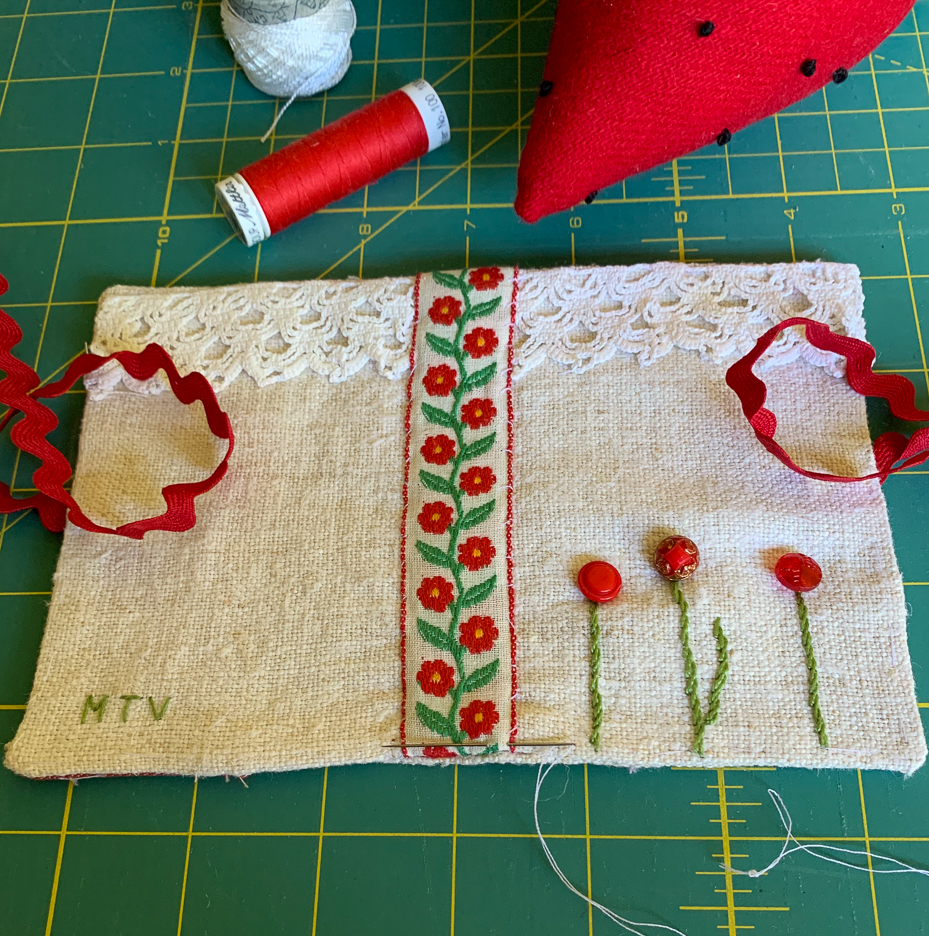
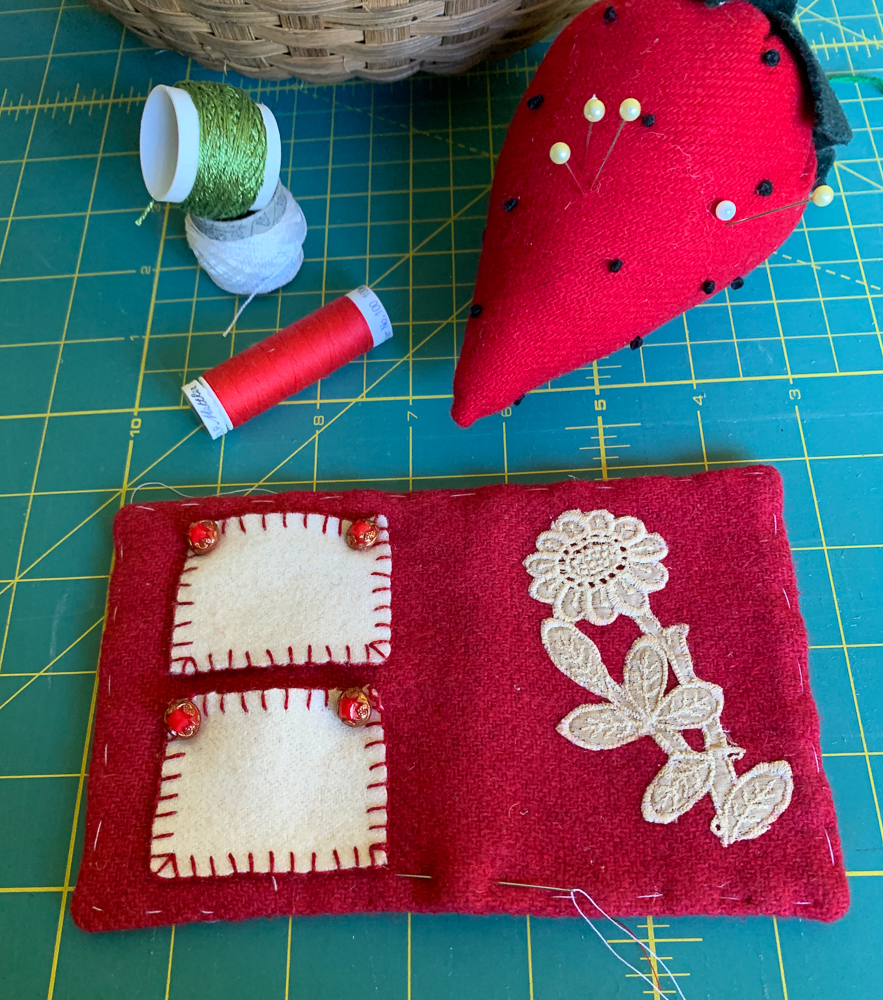
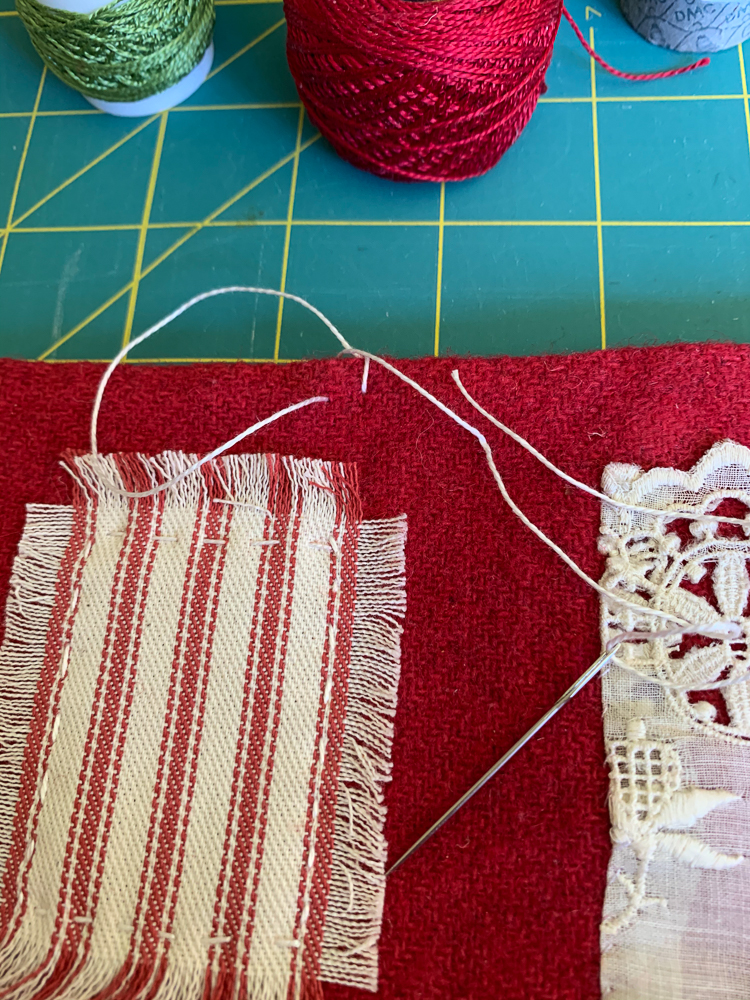
Once the pages are all designed, it is time to attach all of the embellishments, trims and pockets. Since the needle keeper is small and vintage trims are delicate, I found it best to secure the materials to each page by tiny hand stitching with sewing thread. The scissors case in this design was secured to the page by using a blanket stitch which I will describe in this tutorial in just a bit.
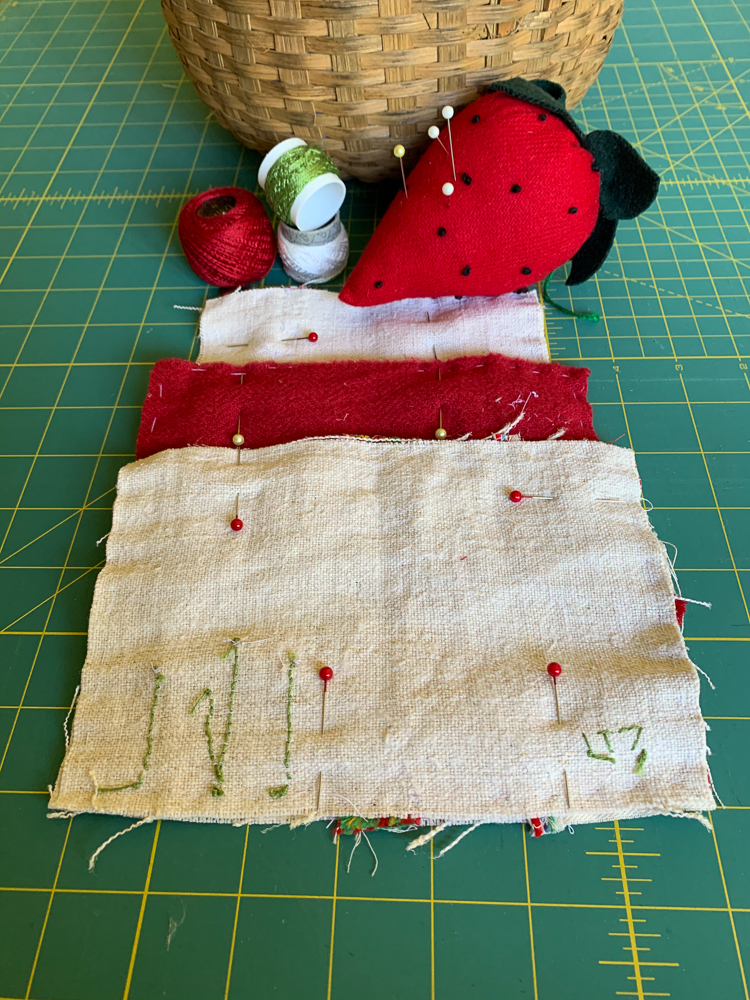
Once everything is attached to the two front pages together with right sides together. Do the same for the middle wool page as well as the interior grain sack or linen page.
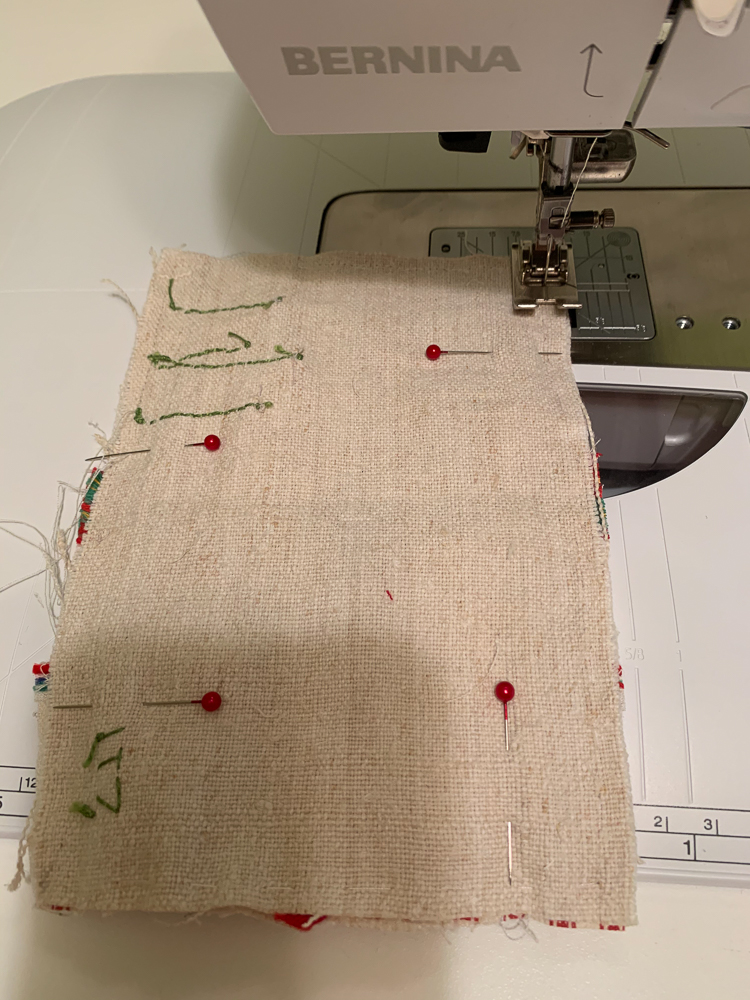
Once everything is pinned, sew the outside seam by machine leaving a 2 inch opening at the bottom so that pages can be turned right side out. The seam allowance allowed for on this pattern is 1/4′. I clipped the corners of each page after the sewing was complete to minimize the bulk in the corners and to make for a sharper edge. Be careful not to cut into the machine stitched seam.
Now it is time to turn the pages right side out through the opening left in the bottom. I carefully poke the fabric out of the corners using a wooden kabob skewer, but a small crochet hook would work as well. Be careful not to poke a hole in the fabric. Gently push the fabric out of the corners.
In order to have nicely edged seams, I used a technique that my grandmother taught me. Gently roll the seam between your thumb and first finger and using a large running stitch baste the seam in place. This makes pressing a breeze and the seam is precisely where it should be.
Press each page, and close the opening that was used to turn each page with small stitches, turning in the edges 1/4″. I pressed each page after the bottom edge was closed to have a nice sharp edge for the decorative blanket stitching.
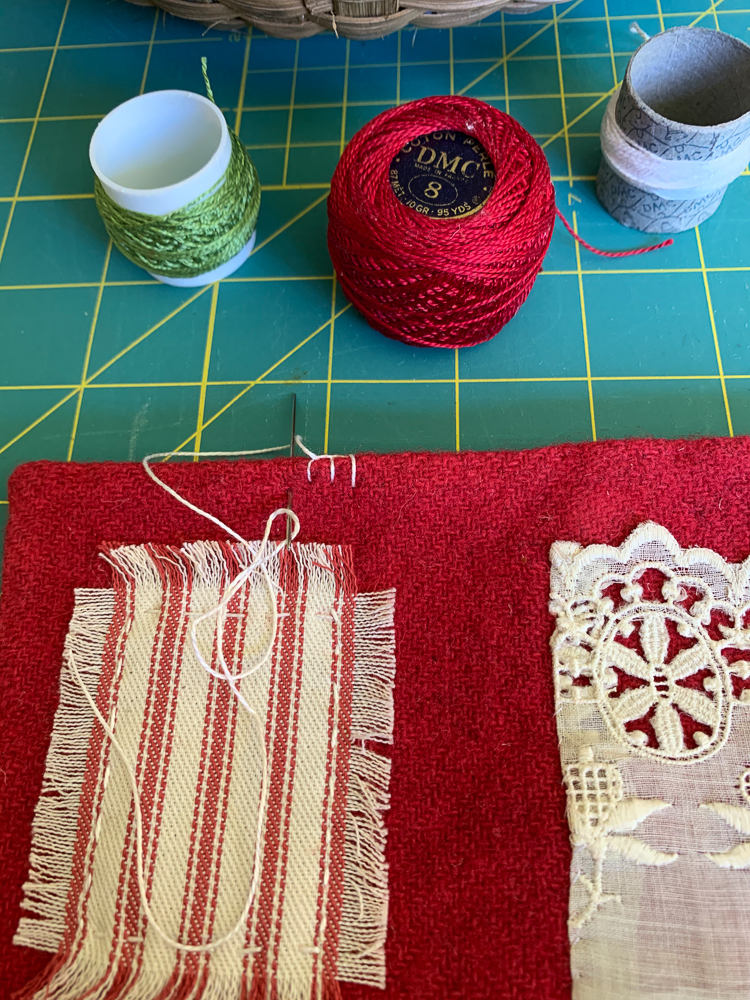
To add the decorative blanket stitch, I used #8 Pearl Cotton by DMC. I love the shine on the pearl cotton, but 3 strands of embroidery floss would also work. The edges can be stitched in a similar color pearl cotton as I did in this sample or contrast threads can be used as I did on the needle book I gifted to my friend Marian of the Miss Mustard Seed blog.
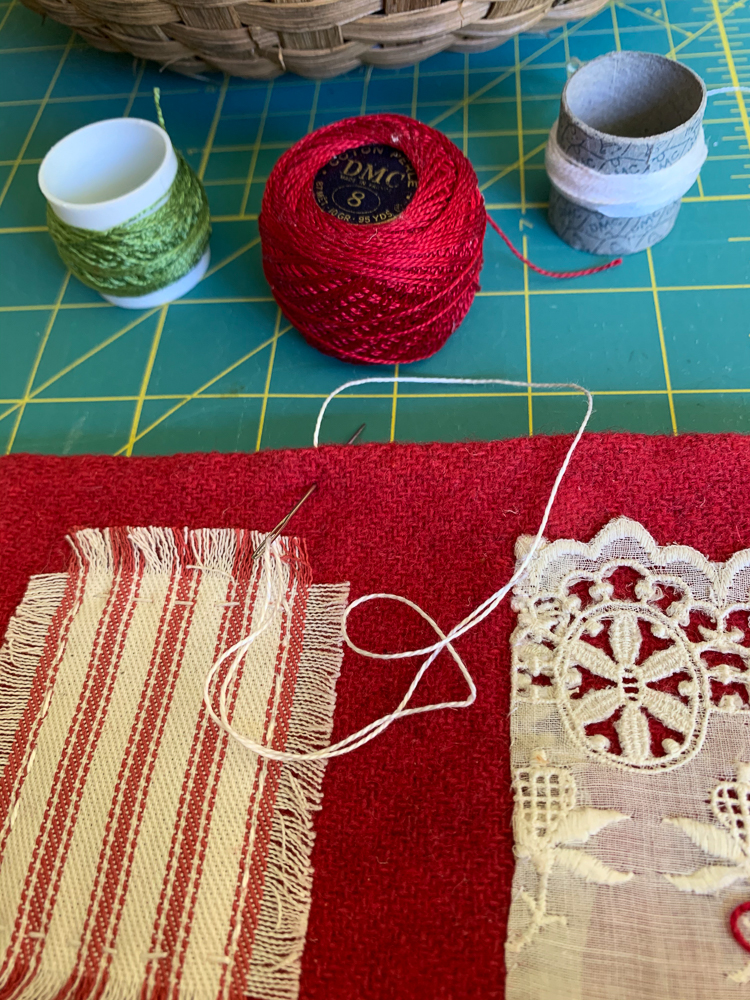
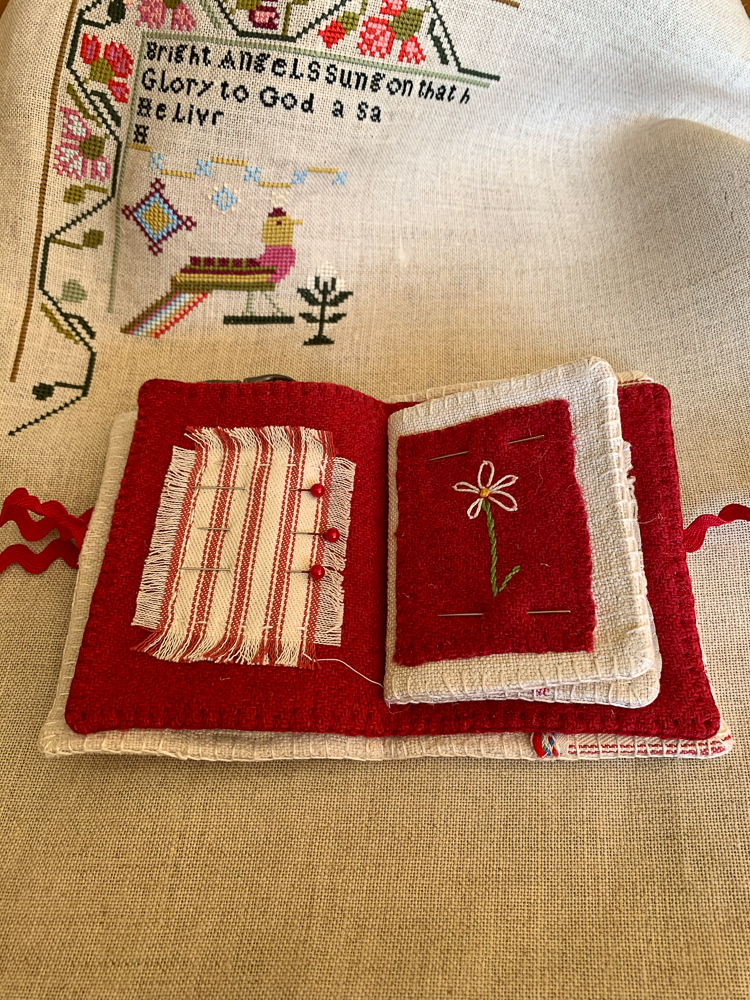
Thread a large eyed needle with the Pearl Cotton. Use a single strand of #5 Pearl Cotton to do the blanket stitch. Rather than knotting the thread I use for blanket stitching, I bury the tail in between the two pieces of material. Insert the needle between the two pieces of each page and bring up through the seam allowance. Next insert your needle about 1/4″ down into the page in a vertical direction and go through both layers of each page. Secure the thread at the top of the page with a very tiny stitch as close as possible to where you inserted the needle into the seam to start. Once you have the thread secured use the needle to pass under your first stitch. Moving to the left insert the needle about 1/8″ to 1/4″ from your first stitch, the thread will be on top of your book, insert the needle into the part of the page facing you and bring up on the back of your work. Before pulling the thread tight, insert your needle in the loop that forms. Continue this stitch until the entire edge of the page is blanket stitched. Blanket stitch the remaining pages of the needle book.
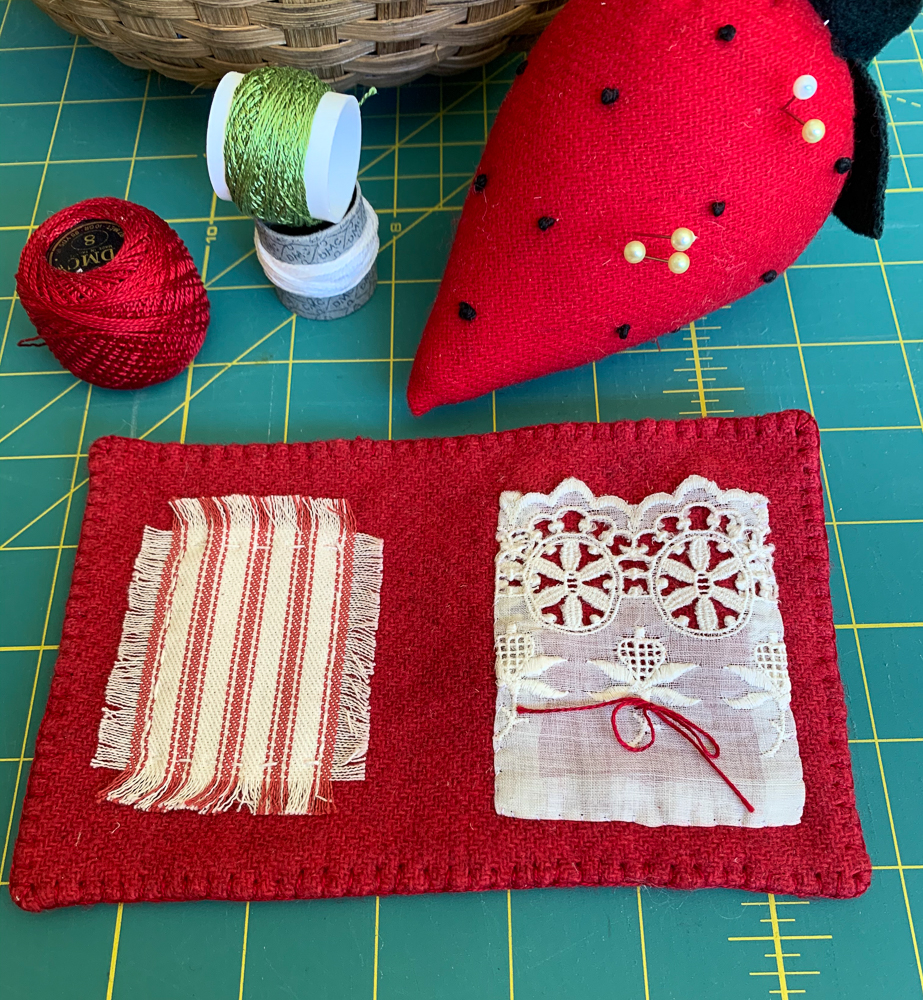
Once the blanket stitching is complete on all of the pages, fold the pages in half and press making certain the page edges are aligned. Insert the interior page in the fold of the middle page, centering it on the middle page. Secure the inner page to the middle page with 6 hand stitches done right on top of one another over the edge of the page with regular sewing thread on both the top and bottom of the page. Next insert these two pages into the fold of the cover page making certain they are centered on the fold and secure with the same technique you used on the inner and middle pages.
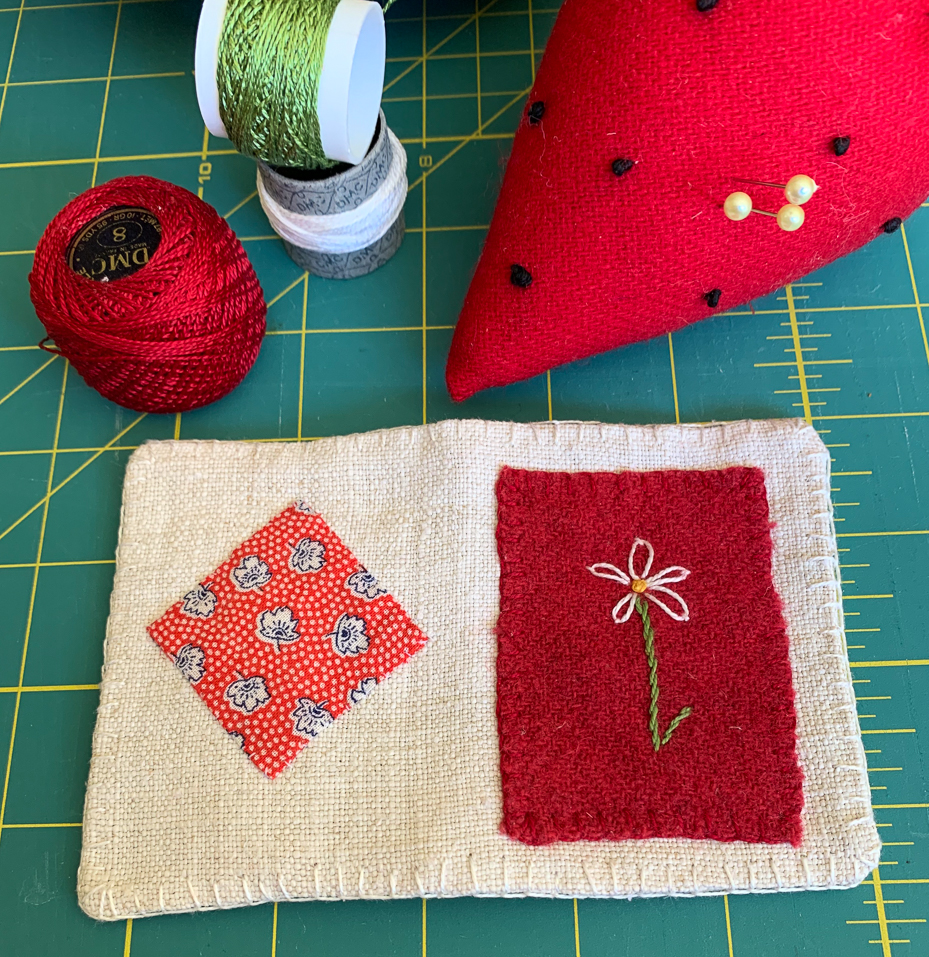

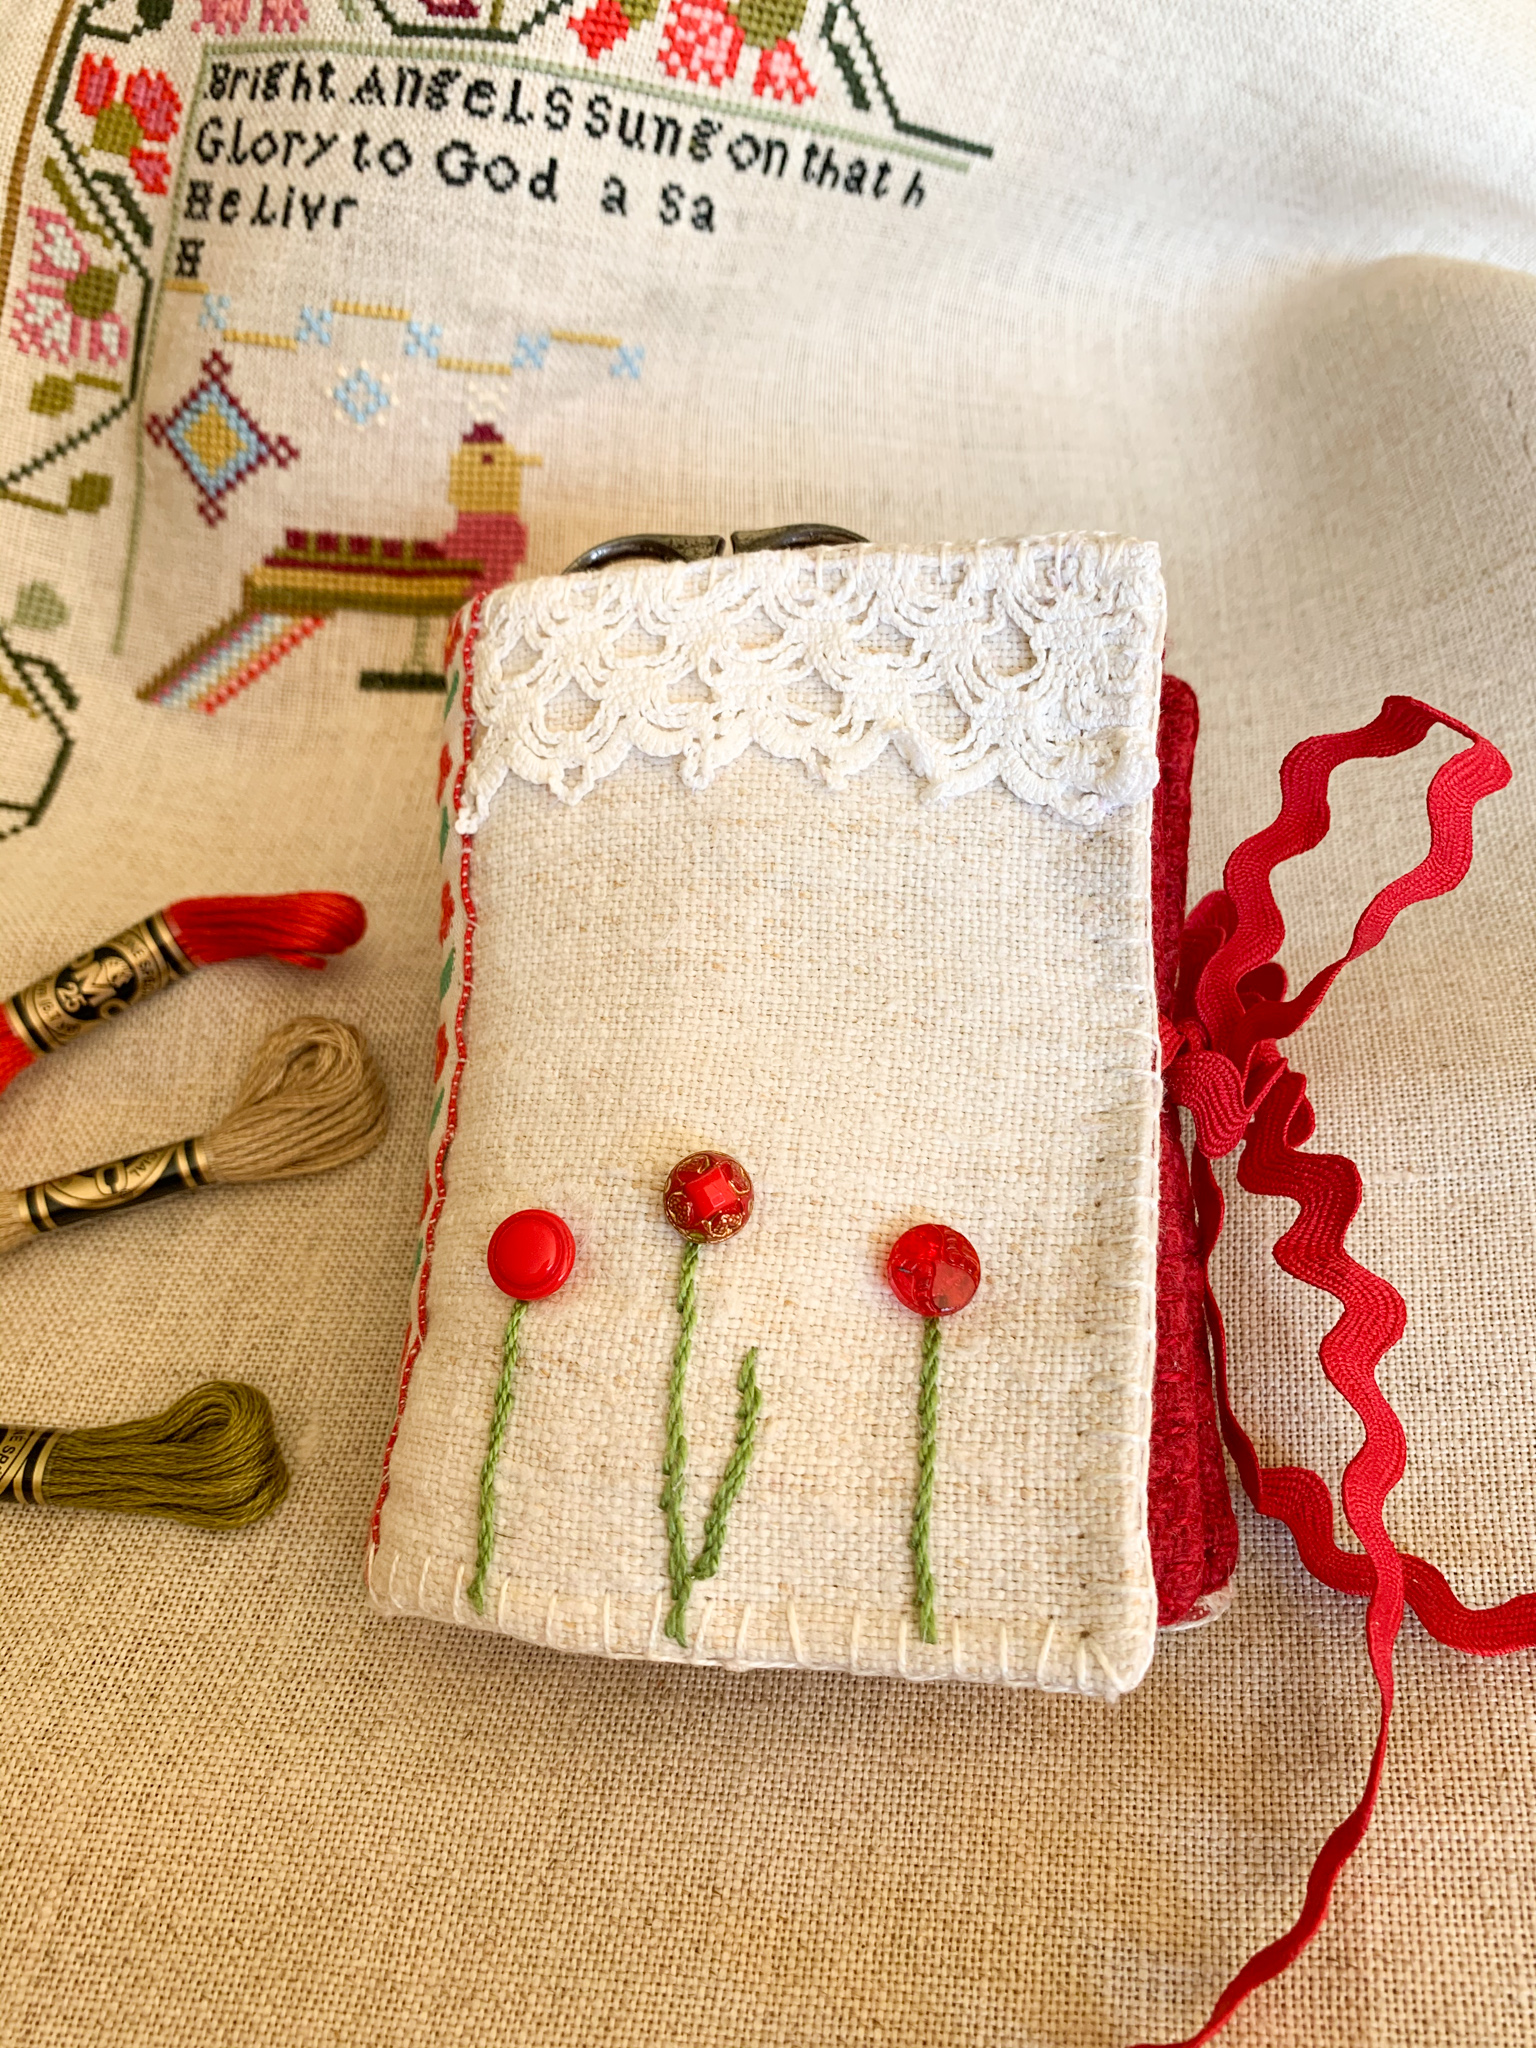
After your needle book is complete you can fill it with all of the sewing notions that you use for your sewing tasks. I would love to see and share your finished projects so please send me a photo by email or DM on my Instagram account. If you would like to order a commissioned needle book you can contact me again with by email or a DM. Subscribe to my blog so that you can receive my tutorials, tips and stories by email.

Really beautiful. And very well explained. I can’t wait to get started. I found some old embroidered linens that I think my grandmother made. I’m thinking of cutting them up (yikes!) to make a booklet for my mother. Not sure I can go through with cutting them but I know Mom would love it.
The needle book would be really special with your grandmother’s linens, and you only need small pieces of material. Please send me photos of your completed needle book. I would love to see it.
This needle keeper is the cutest thing ever! I came over from Miss mustard Seed blog, just wanted to say hi and see what other fun things you’re up to. your blog is really pretty!
I’ll definitely be making my own needle keeper.
I would love to see pictures of your needle book, please share with me.