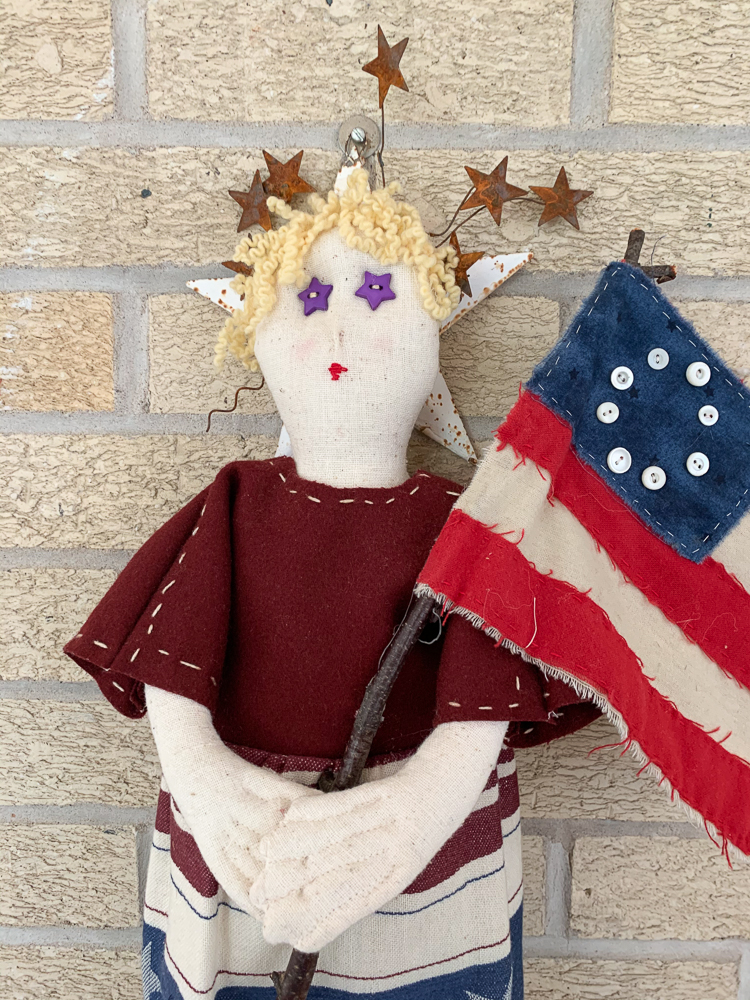
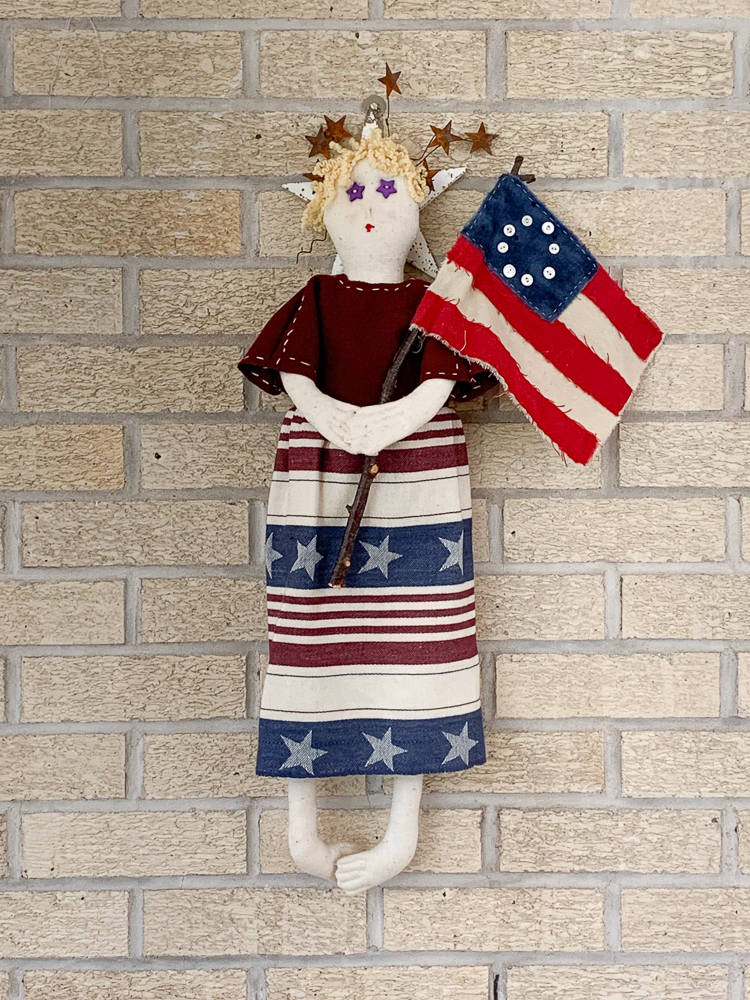
Traditionally, when the calendar page flipped to July it was time to dress Trout Lily Hill up in the “Stars and Stripes”. I hung buntings and flags, made certain the kids had special patriotic outfits and for many years directed and organized the neighborhood bicycle and wagon parade. Gone are the days of neighborhood parades and special holiday dress but as I took out this original folk art piece to hang all of those cherished memories came back instantly. 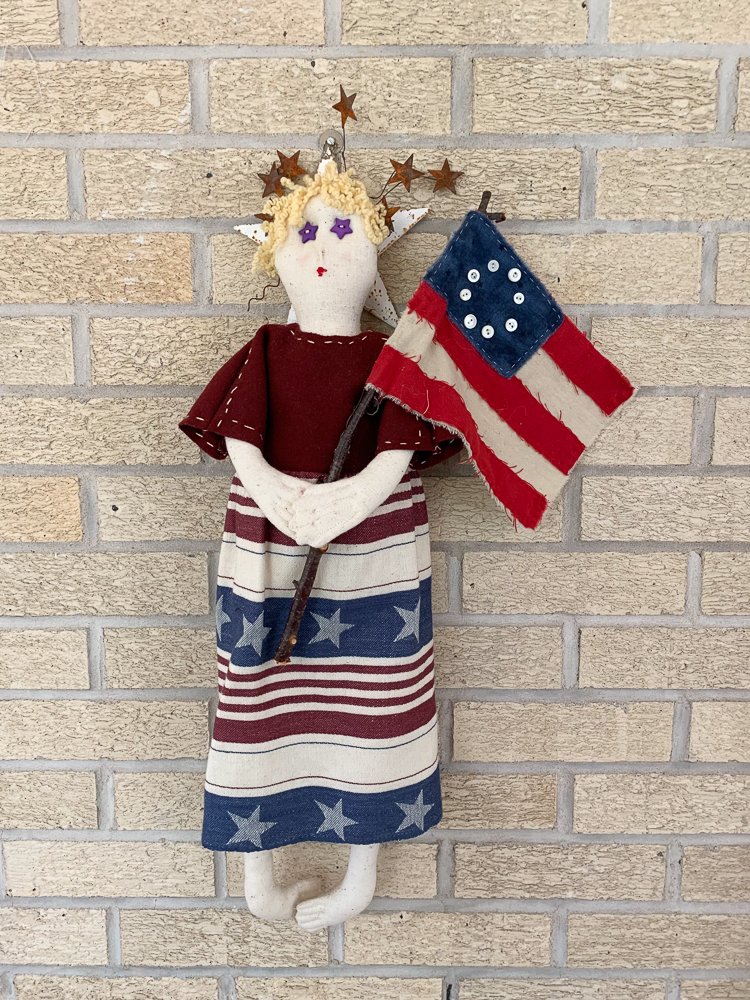
The summer my daughter was nine, I planned and hosted a needle arts camp for Hannah and six of her friends. Every afternoon from 1:00 to 5:00 pm, the girls sat around my dining room table stitching, chatting and learning a few sewing skills and techniques. As a teacher, I believe it is important to showcase a student’s progress so as I thought about materials for this camp, I designed projects that the girls could take home and proudly display. In a week’s time, they stitched a simple wool appliqué picture, made an embroidered picture using simple stitches and vintage Czech glass buttons, did a small cross stitch sampler and the final project was this Lady Liberty, a piece of folk art. The photographs in this post are of my daughter’s creation.
I wanted to give the girls an opportunity to sew simple seams on a sewing machine but I only had one machine at that time so I pre-made all of the doll bodies out of unbleached osnaburg fabric, leaving the dress for them to sew on the machine. Osnaburg is a perfect fabric to use for folk art because it has a linen look but does not fray as easily as linen and has more texture and depth than muslin. Imagine the girls surprise when they arrived and saw the dining room table piled with naked, hairless doll bodies. At least when their “Barbie” dolls were left undressed they had hair and facial features. I designed the project to have components that could be done in different stages. When one girl was machine sewing the simple seams on Lady Liberty’s gown, the others could be hand-sewing another part of the project. Planning ahead with the materials I selected helped to make the machine sewing and dress finishing a simple task. I found the great patriotic stripe fabric for the skirt in a little shop and it was only 18″ wide, enabling one salvage edge to be used for the hem of the skirt. I machine washed the wool for the bodice in hot water and dried it in the dryer to felt the fibers so that the neck edge and sleeves would not need to be hemmed.
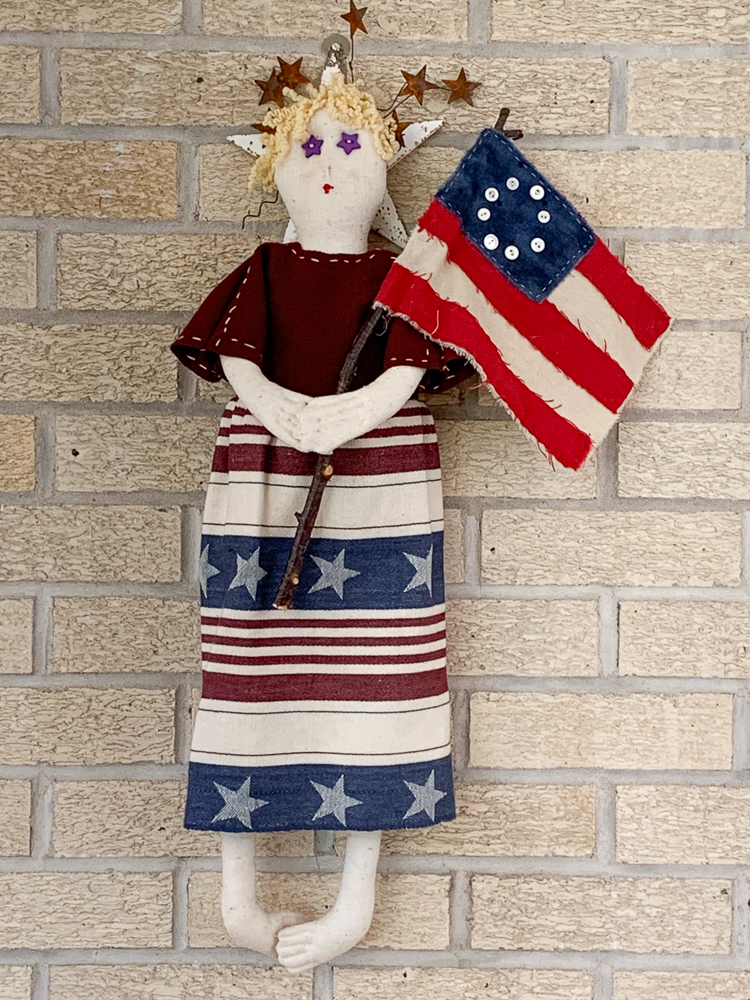
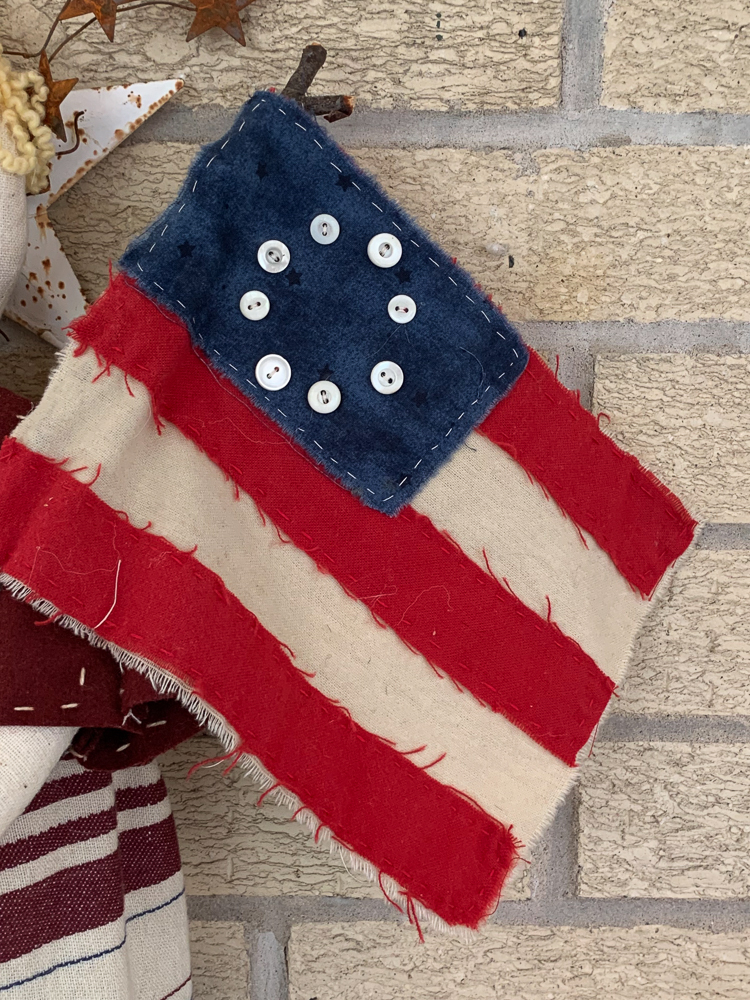
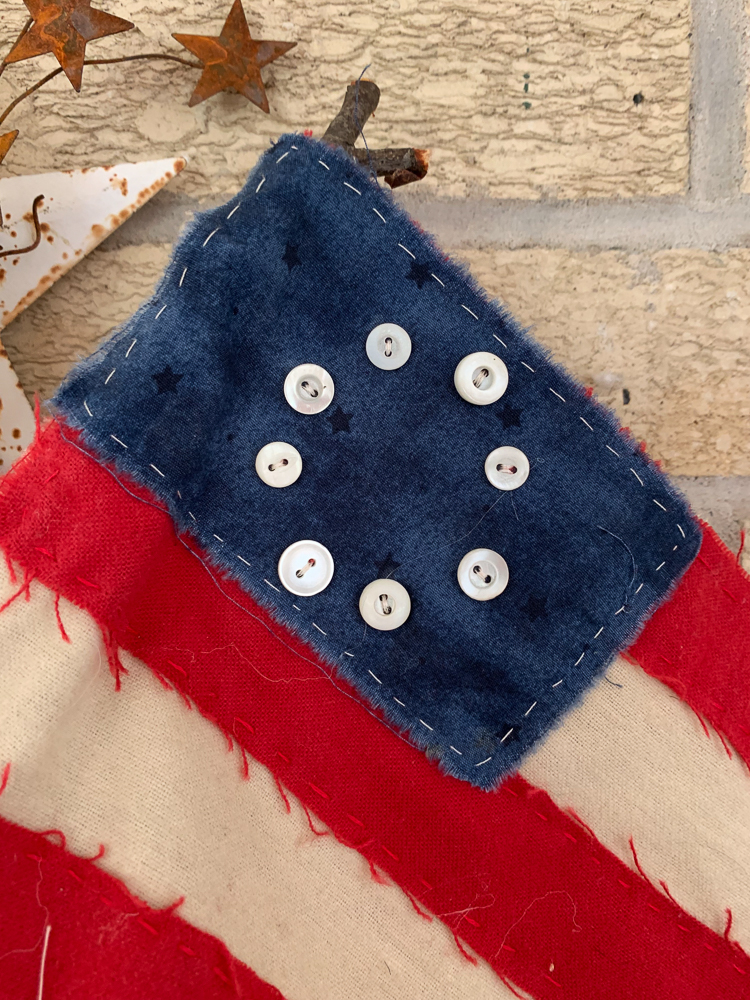
The flag was made using red and white flannel for the stripes. The girls stitched red stripes onto a white flannel rectangle and then attached a small piece of blue cotton for the field. Stars were created with a variety of vintage two hole buttons. I wanted to make sure the girls learned how to sew on a button. It was so interesting how each of the girls decided to place the stars, some made rows, some scattered the buttons and my daughter chose to arrange her buttons just as Betsy Ross did on that first flag, although it looks like she left out a few of the thirteen Colonies. A simple twig from the backyard became a flag pole.
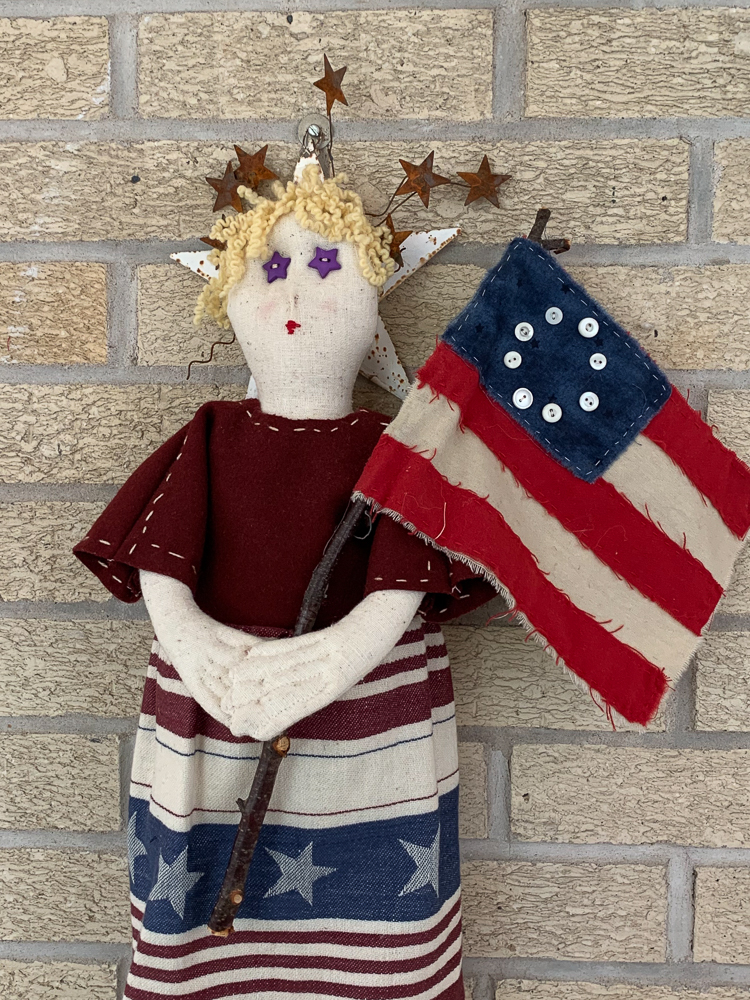
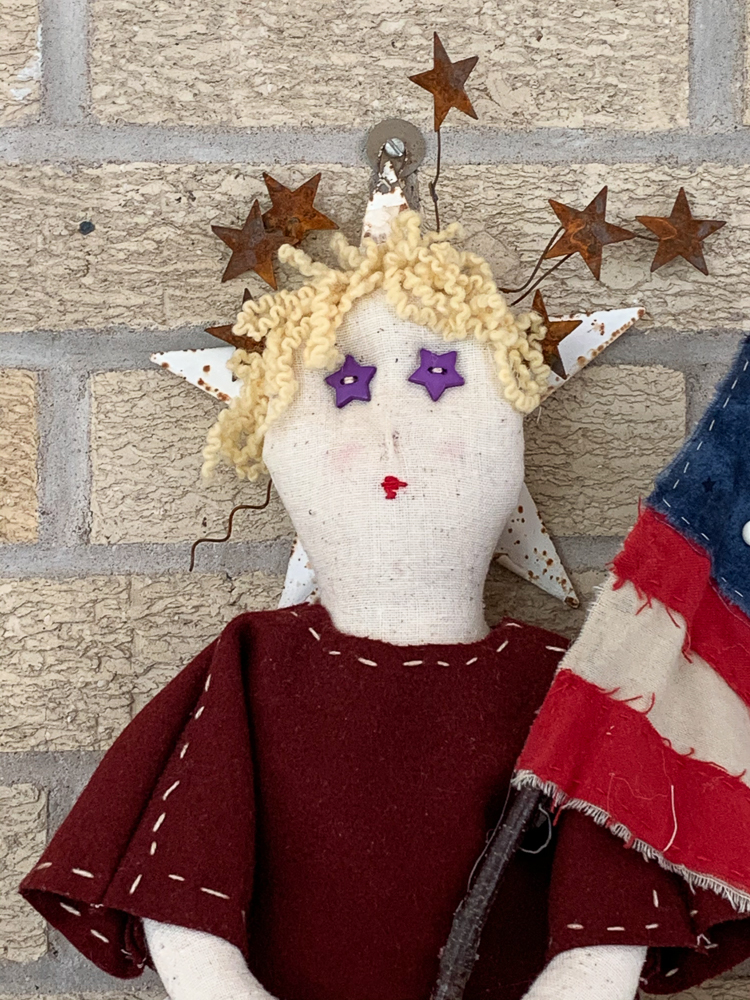
The star eye buttons were navy way back then, but over the years they have faded to a more purple shade. A few in and out stitches through the stuffing enabled the girls to fashion a little nose and several strands of floss and a satin stitch made the mouth. Like any proper lady, she needed blushing cheeks and the girls used my blush and a Q-tip to give her face a little glow.
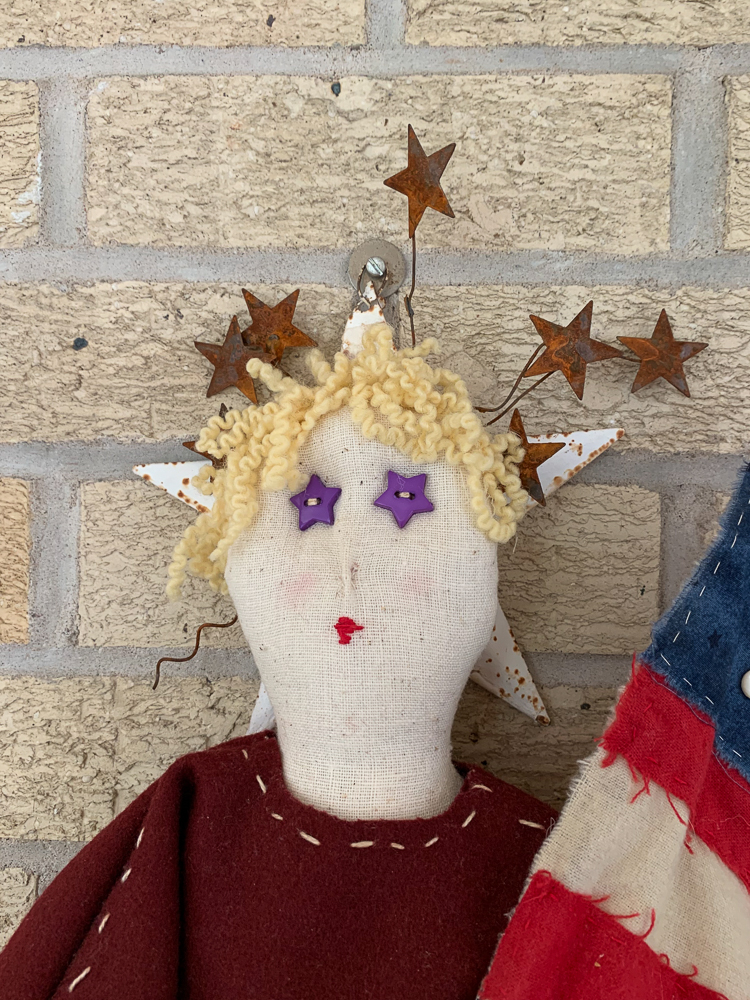
I had several colors of this curly yarn that the girls could select from, but surprisingly they all wanted their ladies to have “blonde” hair. The hair styles were unique. Some ladies had long stringy hair, others had braids or pigtails and one of the girls even made a bun at the top of Lady Liberty’s head. The metal crown with rusty stars was a Christmas ornament sold in a historic village not far from home. I would never hang ornaments like that on a Christmas tree but it was the perfect adornment hot glued to the back of the head. Since the ornament came with a twisted wire hanger, it made it super easy to hang on the door or wall.
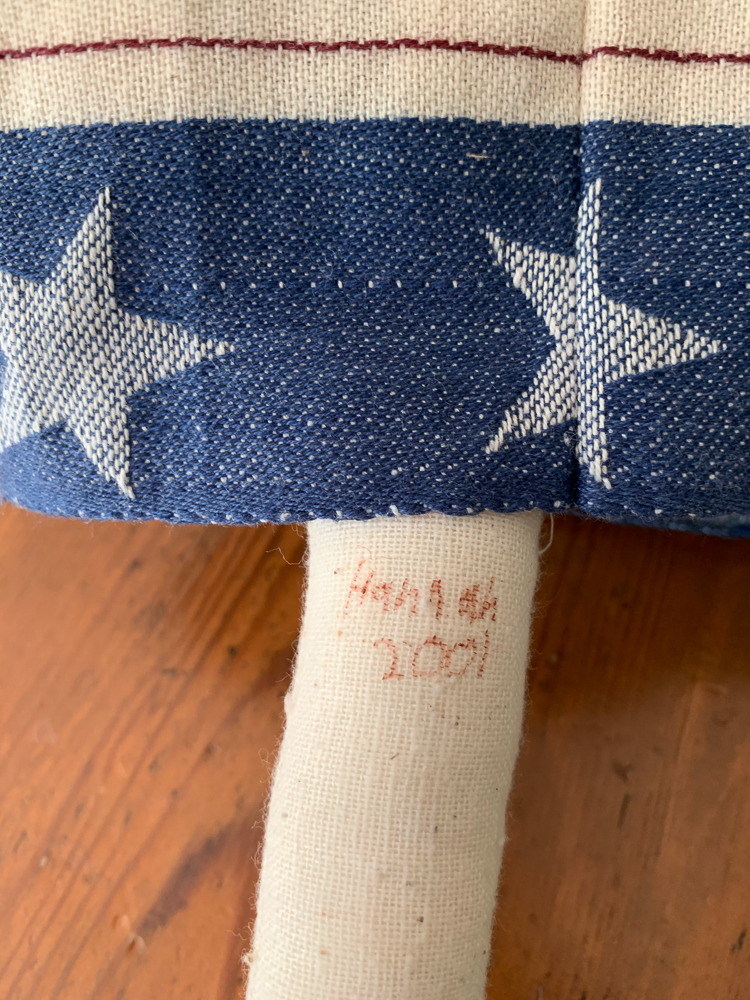
The last thing the girls did was sign and date their original textile design. I am hoping a few of the girls remember that wonderful afternoon of cherished conversation, friendship and learning nineteen years ago as they hang their “Lady Liberty” to celebrate the Red, White and Blue!

I love this. I am a retire Family and Consumer Science teacher and taught a sewing class. I loved to see the delight my students had when they realized that they were “creating”! Imagine MY DELIGHT when I went back to school to visit and one of my sewing groups now had a text group that they named “sewing sisters”!!!!
Beverly what a lovely tribute to your teaching! I was a high school Biology teacher but I did costuming for the school plays and musicals and occasionally on a special day could use my sewing design skills to teach a creative mini session.
What a wonderful heirloom folk art Americana piece and wonderful memories. Love it!
Thank you Lisa, the best part is all of the memories.
Oh my gosh, this is such a great story. I love how you had a class and her friends came over to learn from you. She must have been so happy you were her mom. I had so many things my daughter created, yet time and to many moves, many of them are no longer here. I do have some animals she made of clay in first grade and was finally able to unpack them and they are on the shelf in my den. My grandson just asked me “Annie who made those?”. I got to say “your mom!” He is very creative and loves to paint…I think our next Tuesday at Annies might need to include a sewing project!! Any ideas for a boy (although I do like the flag, the 4th will unfortunately be past).
Robin, the clay animals from your daughter sound delightful and how fabulous to have her son admire them! I do have a sewing idea that a boy might be interested in. Perhaps you could give him a variety of small pieces of fabric and have him cut them into pieces and make a collage type pictures. He could attach the pieces to a larger piece of fabric with larger stitches and even add some buttons for embellishment. Here are two examples:
http://suffieldart.blogspot.com/2013/01/fabric-collage.html
https://lacreativemama.com/how-to-make-fabric-collage-applique/
So happy I found your blog and I love the idea of a sewing class for kids! I want to start teaching my granddaughters how to sew soon, they are only 5 now. I would love if you would consider a post on how to teach children to sew and simple projects for them!
Theresa, that is a fabulous idea. Perhaps I could do a monthly feature for children’s sewing projects. I don’t think 5 is too young to start. The biggest problem with kids is needle threading but an adult can do it or a needle threader works great.